
Time to unscrew the hardware. I decided to reuse the label bracket so I kept those off to the side but the handles and brass lock were goners.

Voila! A semi clean slate to work with!

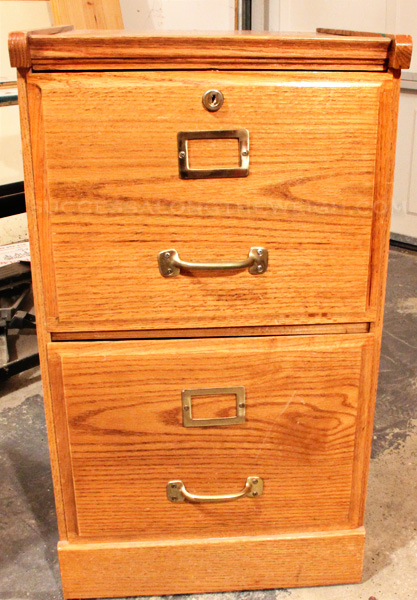
Before I got started, I made sure the new lock I bought fit properly in the hole. I didn't want to do all of that work just to find out that it wasn't the right fit with the pre-existing hole and slot for the lock.

Time to sand! There were a few surface nicks I was anxious to get rid of as well as that thick layer of shellac!

I filled the holes where the original handle was with Elmer's Wood Filler (Natural) (affiliate link) since the handles I had to replace them were a different size.

As the wood filler was drying, I sanded the veneer on the back of the cabinet by hand with a 220 grit very fine sandpaper. Then I went back to the wood filler when it was dry and sanded until smooth.

Then it was time to prime. I used the same primer I used for the ceiling fan blades, the Rustoleum spray primer. (Thank goodness for the "heat wave" so I could get several projects done at once!)

Body was primed and then did the drawers and let them dry.

Time to sand everything with 220 grit (fine grit) sandpaper until smooth.

To paint the screws for the label holder, I taped them together and just gave them a quick spray of Rustoleum Semi Gloss Black spray paint. (Affiliate link)

Then it was on to the label holders which were primed and then painted with the same paint.

Time to shrink some brain cells (even with the mask!) by spray painting the body and drawers in even, thin coats.

I did 2 coats plus some touch up and let them dry. Then I got the 220 sandpaper and distressed the edges of the drawer kind of willy nilly. I liked the way some primer showed through on some parts and other had wood.

After I got the distressing where I liked it (and trust me, I've had to repaint a part or two and try again), I made sure everything was dry and then put a coat of Rustoleum matte finish clear coat over the distressed portions. Then when that was dry, I did a coat over everything, touching up where needed when it was dry.

Time to measure where the holes for the new handle goes! Thankfully I could slightly see where the old holes were and wanted that covered up with the new handles so I knew about where to put them. I measured 2 1/4" up from the lip and 1/2" out from the old holes. Luckily it was pretty easy to see where the holes were on the handle so we could mark it slightly higher then move it down to cover when I marked.

Drilling time! Is it weird this made me feel like a DIY maven? I don't use drills. Well, I didn't but I said screw it (HA! An unintentional funny!) and went for it. I did have to drill the holes slightly bigger than the bit used here for them to line up correctly but when they did, there was another problem...

The screws were too long so luckily the Mr came to the rescue with his Dremel to cut off the end of the screw to fit. (Affiliate link)

Let's just say sparks flew!

We got the label bracket and handles on the front. (Sorry, there was a lot of dust flying, bad pic!)

Time to install the lock. It was a pain in my butt...

But I finally got it installed with minimum cursing. Plus!

We put those drawers in and moved it inside and got a pic.

Here's the drawer a little closer.

Finally the before and after. I'm so glad I decided to give this file cabinet a second life and instead of $120+ to replace it with something similar, it was about $20 in materials to revive!

What pieces of furniture have you given new life either by painting or using in a different way than originally intended?
Like this post? Don't miss another one...subscribe via email or RSS feed. (Because you're cool like that!)
Great job!! All your DIY projects are inspiring me as I look around at all the potential projects! (And I have the time right now!!)
ReplyDeleteThanks Kathi! I'll tell ya, this has made me look at furniture completely different. If I see something at an antique store that has good bones, I can see the potential in it now that I might've said "oh that's nice, too bad it's not (insert color I was looking for)" I'm kind of excited to see what else I can revive!
ReplyDeleteWow! We have one of those old oak filing cabinets too and it would never have occurred to me to give it new life. What a great job. Congrats!
ReplyDeleteThat looks great! I never think to do this stuff. It just goes to the basement graveyard...
ReplyDeleteand it doesn't even look like oak. Great job!
ReplyDeleteI did my windowsills shortly after I moved in, but they need it again this summer. I'm not much of a DIY'er though. I'd like to be, but I just don't have the temperament or skills for it I think.
Fantastic job! I LOVE the handles you picked. It looks so much better now. I have that same file cabinet sitting right behind me--want to do another one???
ReplyDeleteI'm not really a DIYer. Since you can do so much, how about coming to my house and building me a pool enclosure and installing a pool heater? Thanks in advance.
ReplyDeleteWay to go! That looks super cute (and I don't even normally like distressed stuff!).
ReplyDeleteWhen we painted our roof, that gave our house a whole new appearance. We're going to paint our kitchen cabinets (builder grade oak...and I feel the same way as you) and refinish our (oak...my mother's old) kitchen table this year as well.
It really is amazing and instantly (well, a few hours) gratification when it's over. And I always want to show people what I did.
And, on an unrelated note...I PASSED MY EXAM THIS MORNING! I only have one more, and I should be completly done by the middle of April!
Oh yeah, it looks WAY better now. You are awesome! I want to do something similar with my desk, but I never get around to it.
ReplyDeleteThanks so much guys! For those offering to have me redo theirs, call me when pigs fly. (Live ones, don't throw a ham out the window and take a pic!) I love doing this for experience but dang man, I think I'd go nuts if I did this for a living! I can see how it could be satisfying but then it would be hard to sell a piece you were particularly proud of.
ReplyDeleteI've got other projects coming up as well so stay tuned y'all!
Lindsay- CONGRATS on passing the exam!! YAY!
Well done! We have redone a number of pieces of furniture and remodeling projects through the years. We got a used dishwasher for $25 and ended up ripping out the countertops and redoing some plumbing as a result to accommodate it. Yeah, real bargain there! We have fallen prey to the homeowner's four most expensive words: "While we're at it . . . " way too many times!
ReplyDeleteI wonder what the heck Grandpa thought an eight-year-old was going to do with a file cabinet? That said, I got a homework desk of about the same style at about the same age. I loved it, but eventually the yellow finish just got to me. Don't know whatever happened to it.
ReplyDeleteI'm very impressed with your projects. I'll be on the lookout for flying pigs...
Oooh, I like, I like!
ReplyDeleteAs you know, I have a lot of re-do projects going and more stacked up behind them. I love garage sales and thrift stores, because I can see potential in so many pieces. I have to remind myself that just because a piece could be remade doesn't mean I should be the one to do it. :)
Ohhhh, that is so pretty! What a good job! I think I would have been puzzled if my grandfather gave me a filing cabinet when I was a kid. :p
ReplyDeleteThis comment has been removed by a blog administrator.
ReplyDeleteThis comment has been removed by a blog administrator.
ReplyDelete